
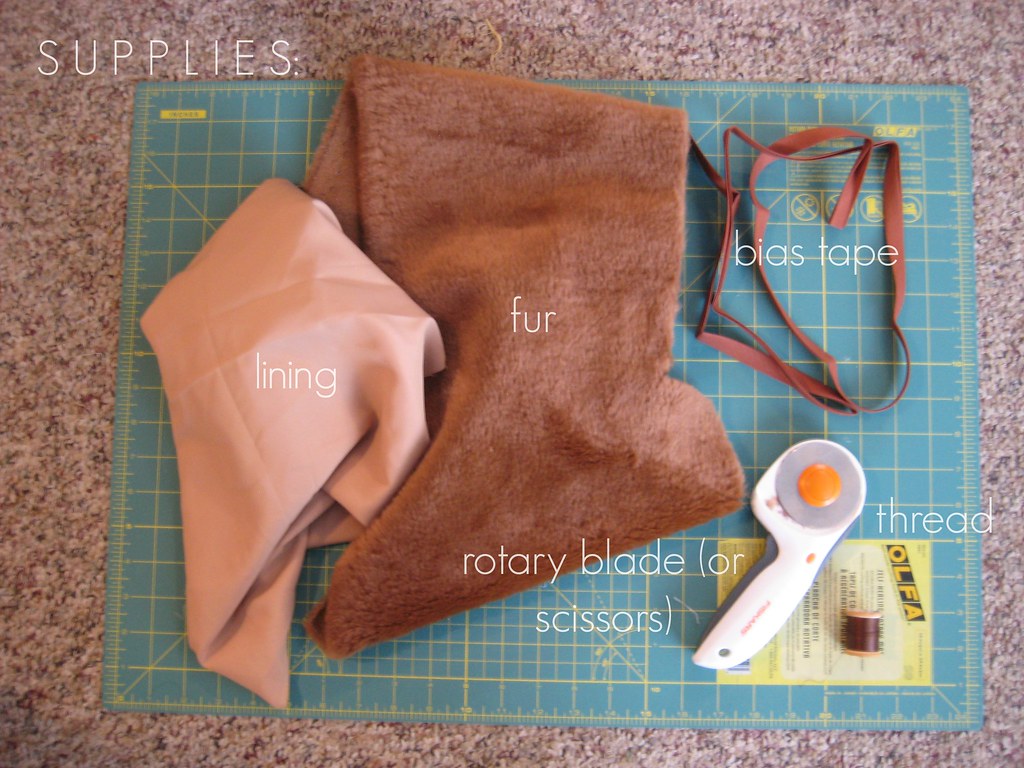
All of my supplies are materials that I had on hand. I thrifted the fur and the lining and the bias tape was left over from another project. I'm dying over THIS fur from mood. It's a little on the pricey side, but it's gorgeous!
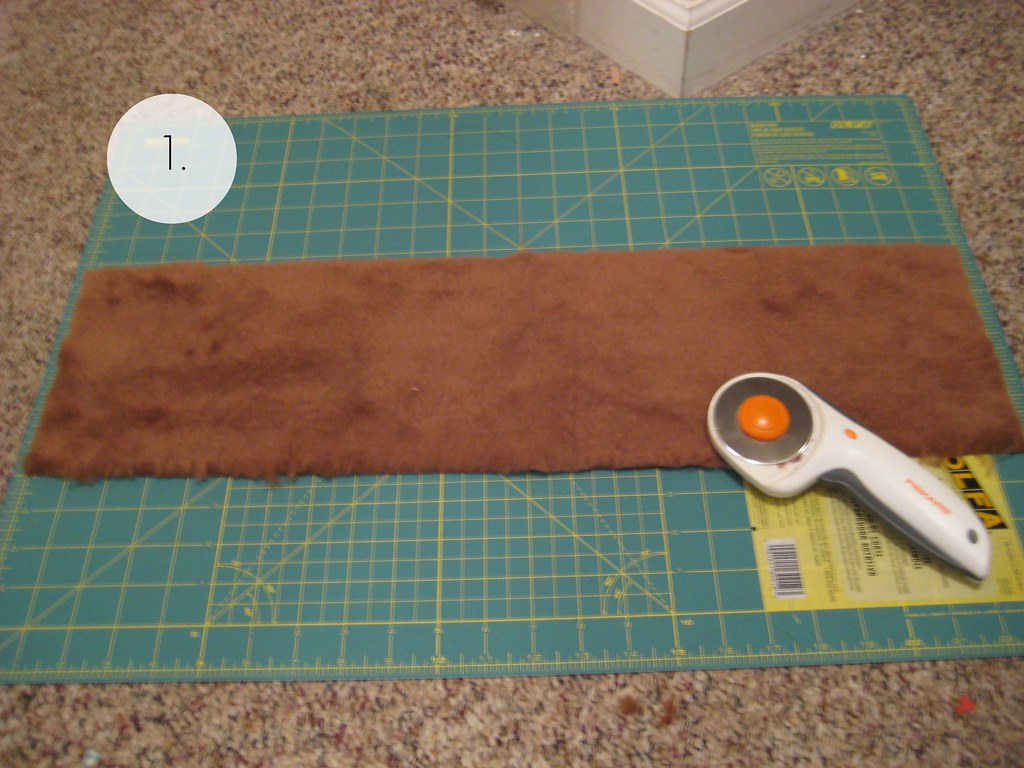
1. Cut fur and lining fabric into a rectangle. My rectangle measurements were 23.5" for the length and 6" for the width. You can cut it longer or shorter or wider if you'd like. It's really up to you!
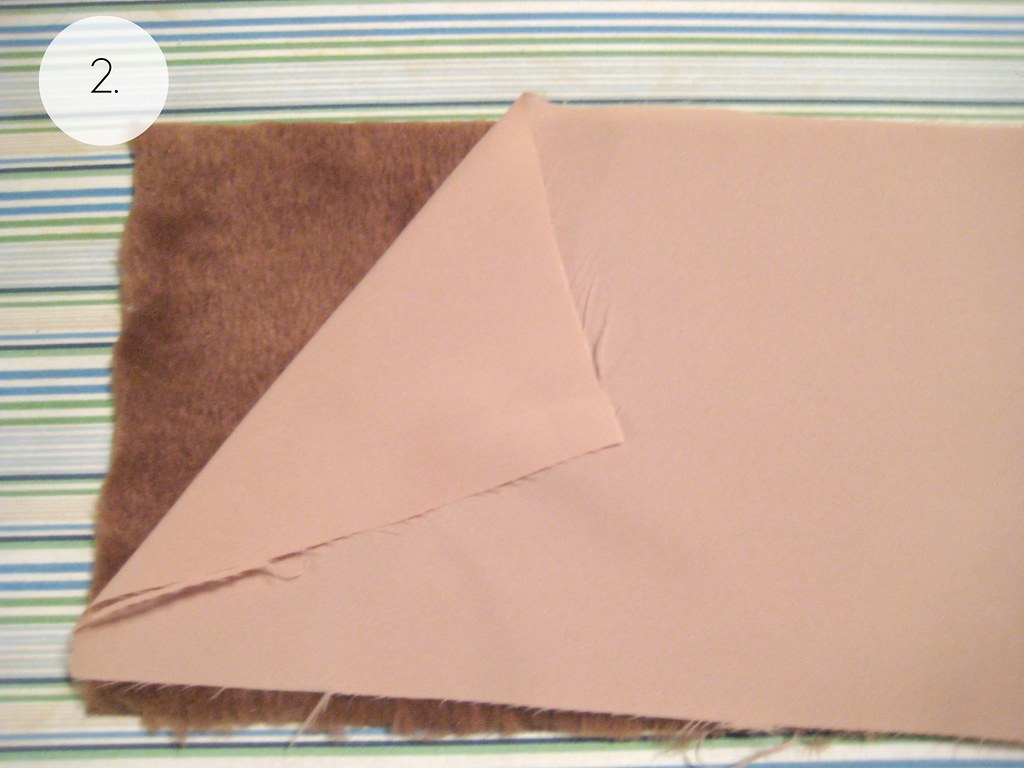
2. After you have cut your rectangle of fur and lining, place the right side of the fabrics together. Pin so fabric stays in place.
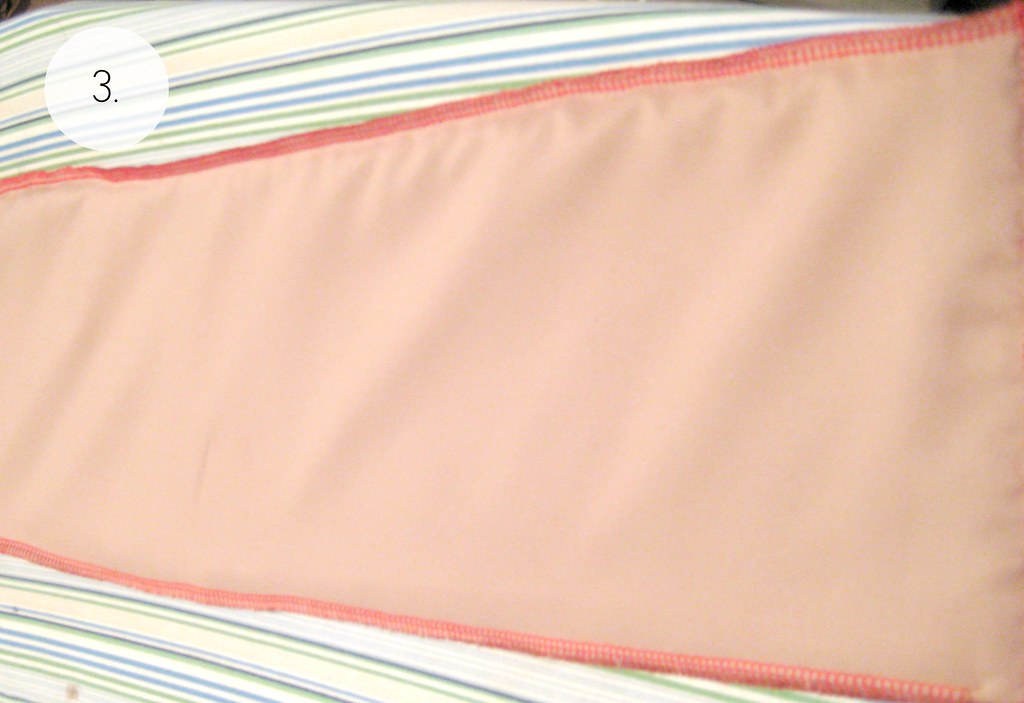
3. Now it's time to sew them together! I just serged mine together, but if you don't have a serger, just use a 1/4" seam allowance. Make sure you leave one end open. After you have sewn the two pieces together (remember to leave one end open) turn the snood right side out.


4. On the end that you didn't sew, place your bias tape on that side and pin it in place. Make sure to leave extra tape at each side. Sew down the bias tape using a 1/4" seam allowance.
5. After you have sewn your the bias tape down, trim down your seam to 1/8". Not pictured: fold the extra edges of bias tape in and then fold the rest of the bias tape to the opposite side. I hand sewed the tape down, but you're welcome to use a sewing machine. I like the look of hand sewing better, but it's your choice.
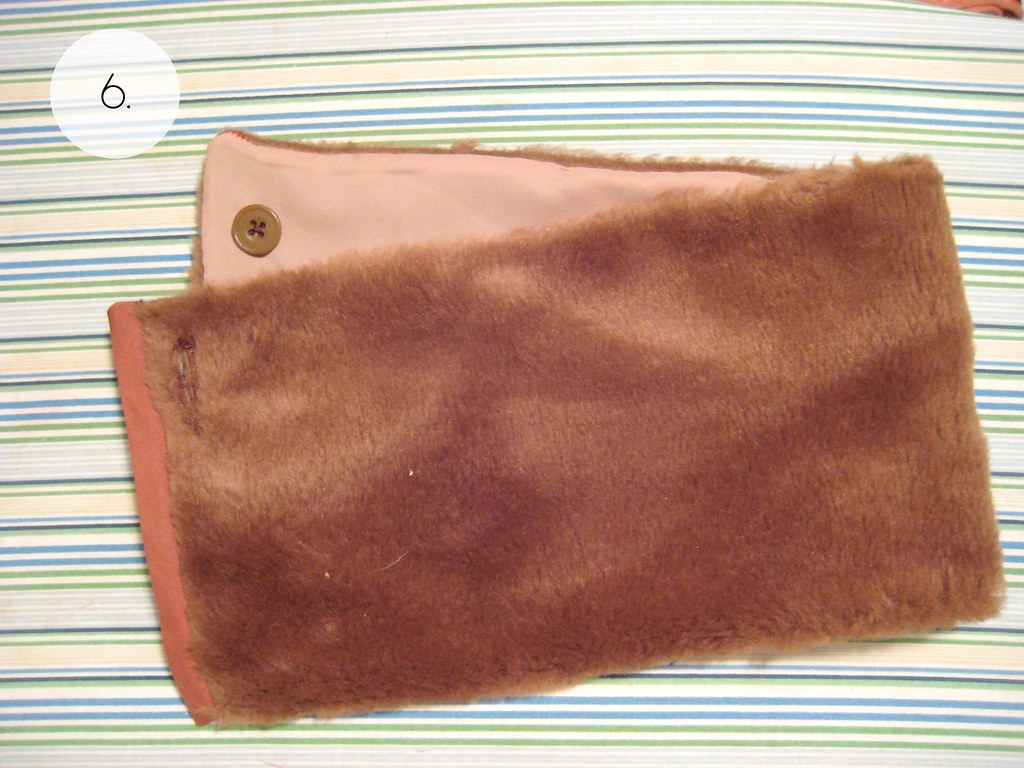
6. For the closure, there are a couple of different options you can choose from! I decided to make a button hole, but I think using Velcro or snaps would be just as effective. I didn't have those supplies on hand so I decided to use buttons instead! For the button option: Take the end that has the bias tape attached and decide what length your buttonhole needs to be and then sew that using a machine. On the opposite end, hand sew your button in place. I only sewed it to the lining so that you wouldn't see the stitches on the fur.
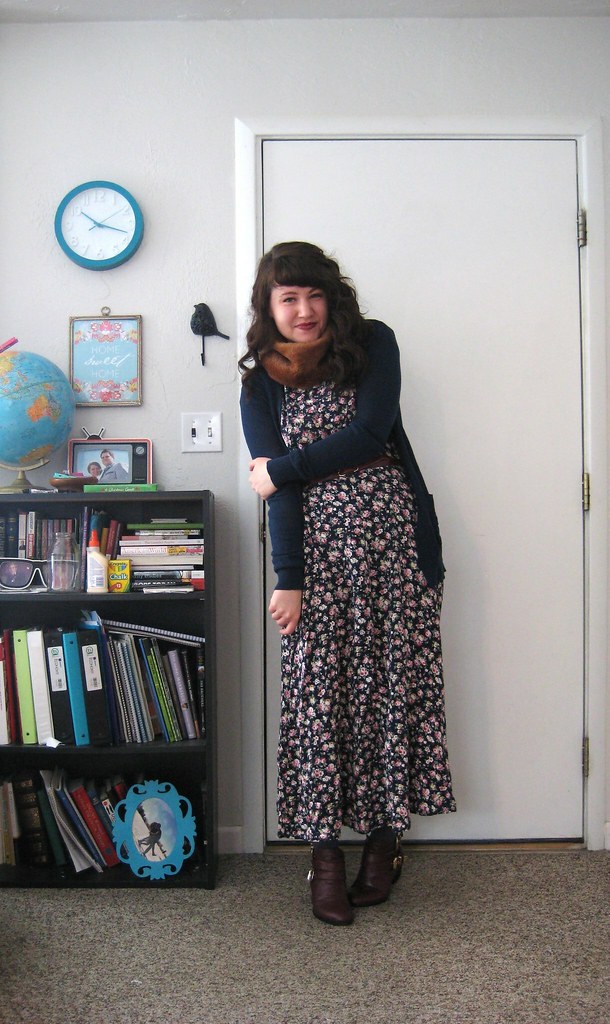
There you have it! I hope this little tutorial is useful for some of you! If anyone is interested, I have just enough fur to make another one. It would $20 and that includes shipping! If anyone wants it, email me!
thriftedthings@gmail.com
Hope you're all having a lovely Thursday :)

Mmm I love fur this season too - I have a faux fur collar thing but it's a very awkward shape and rarely sits the way I want it to. I may just fix it up into something a bit more like this!
ReplyDeletexo
http://katiaengell.blogspot.ca/
That's genius! I need to make one of those- pronto. Thanks for sharing. :)
ReplyDeleteBree
Merriment and Grace
I like this!
ReplyDeleteI wish it was actually cold where i live... its hot and if i wore this i would probably pass out. Not good lol
-Diana
Yeesdear Blog